One map for
the control room.
One for the field.
Maps is the platform's visual command surface — a live operational map for everyday situational awareness, and a tactical Live Mission Map for coordinated Special Ops deployments, sharing the same targets, events, and responder data underneath.
Maps at a glance
Two purpose-built map tools, launched from one landing screen, drawing on the same live operational data.
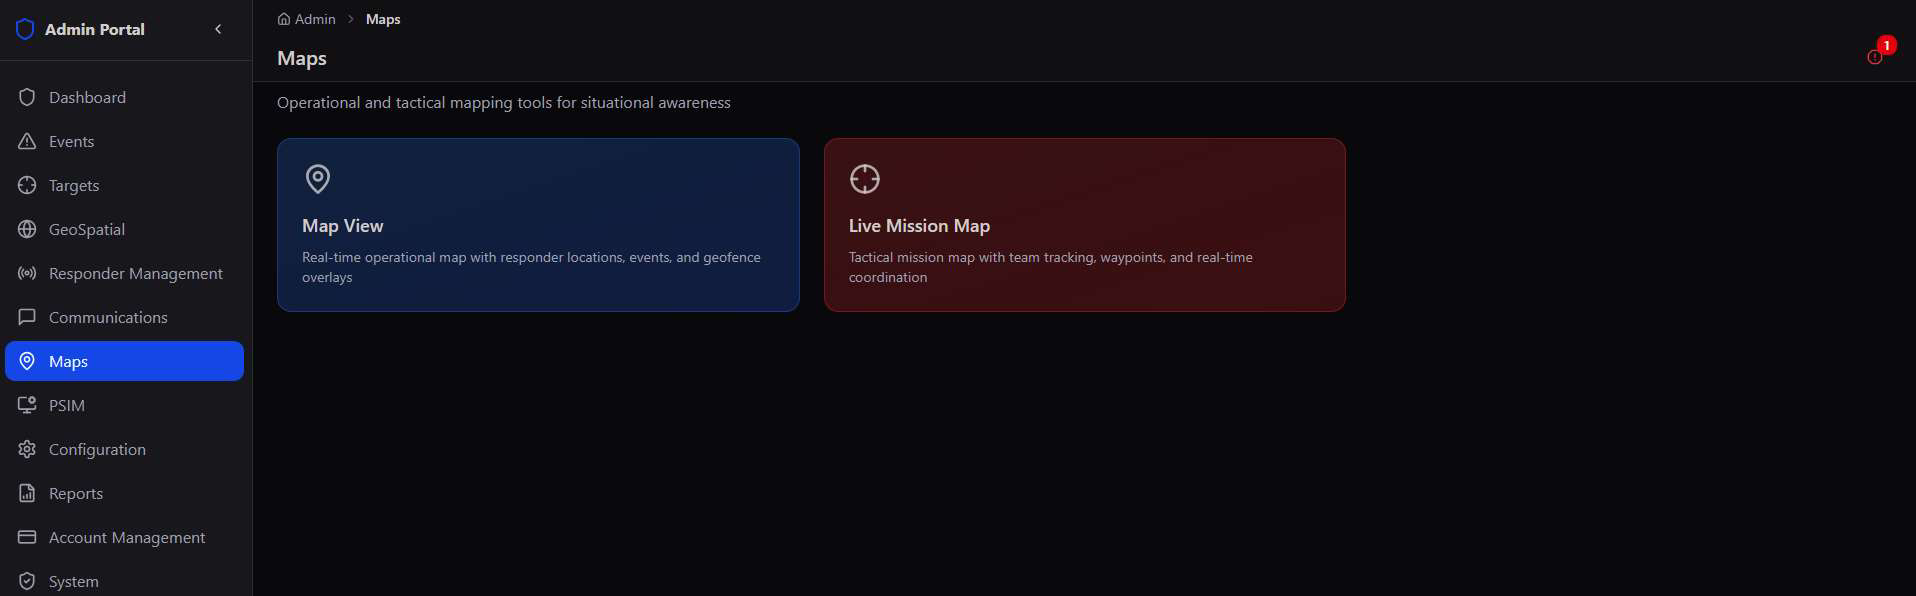
Every event, responder, target, and facility the platform tracks eventually needs to be seen on a map. Maps gives the control room two different lenses on that same data: a broad operational view for everyday monitoring, and a tactical view built specifically for coordinated Special Ops deployments.
Same data, two audiences. Map View is where an operator watches everything at once. Live Mission Map is where a deployed team commander runs one mission — the tools change accordingly, from filters and heatmaps to routes, breadcrumbs, and encrypted tac chat.
Map View
The everyday operational map — every event, responder, and asset, layered, filtered, and clustered for a clear read at a glance.
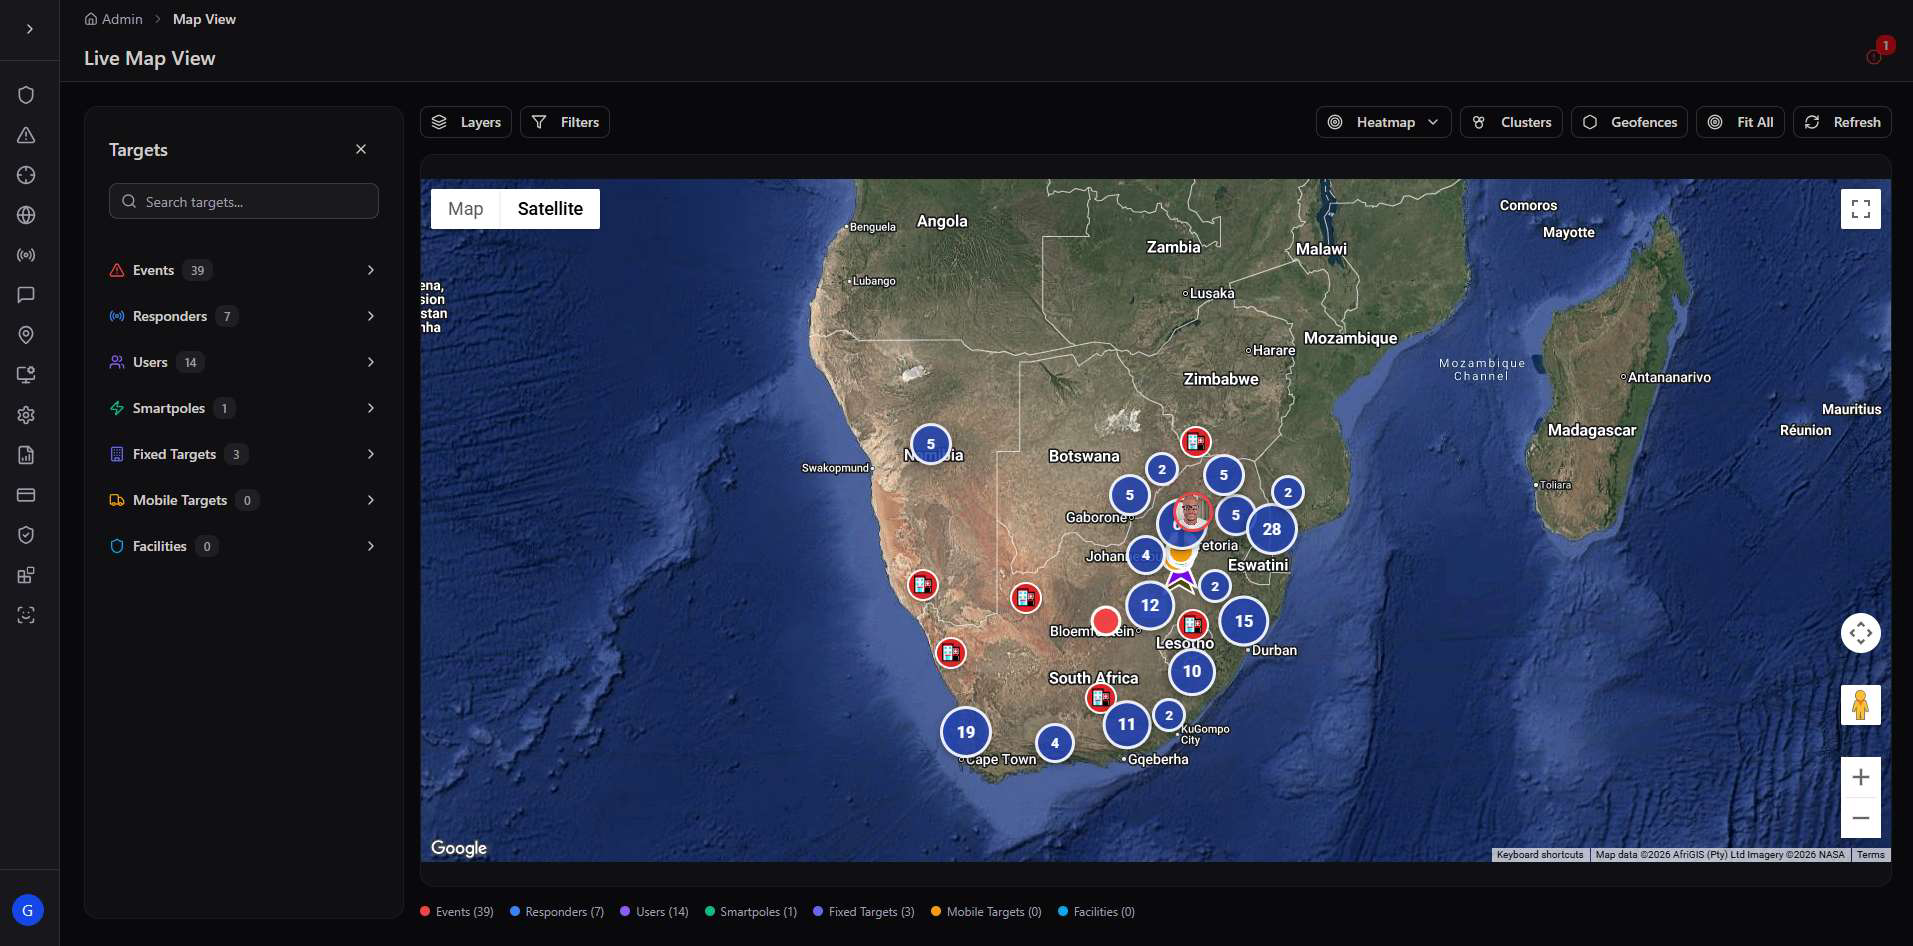
Map View opens on the full coverage area with every target type clustered by location. From here an operator can toggle layers on and off, filter by date or duty status, switch on a heatmap, and drill into any single pin.
Layers, filters, and heatmap
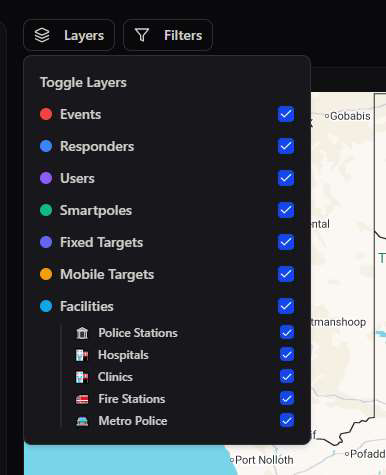
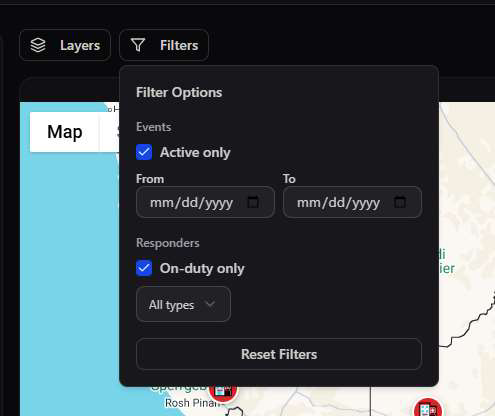
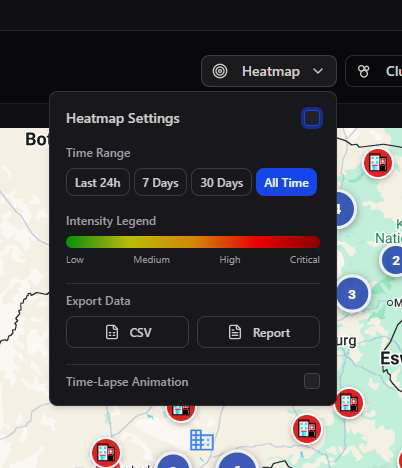
Three controls shape what the map shows without ever leaving the view: Layers decides which target types are visible, Filters narrows by date range or status, and Heatmap switches to an intensity view for spotting patterns over time.
Geofence overlays
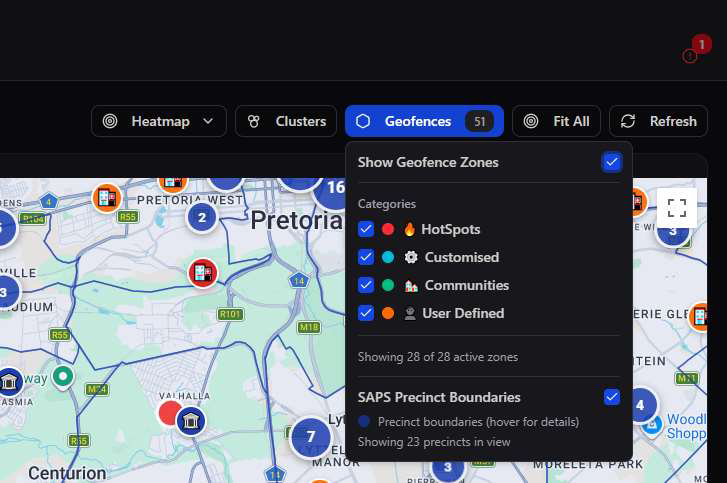
Geofences shows every configured monitoring zone directly on the map, grouped by category, alongside official SAPS precinct boundaries for jurisdictional context.
Fit All and Refresh. Fit All reframes the map to every currently visible target in one click — useful after changing filters. Refresh pulls the latest positions without reloading the page, keeping a long-running control-room session current.
Target Layers & Details
Every pin opens into the detail an operator actually needs — no two target types show the same card.
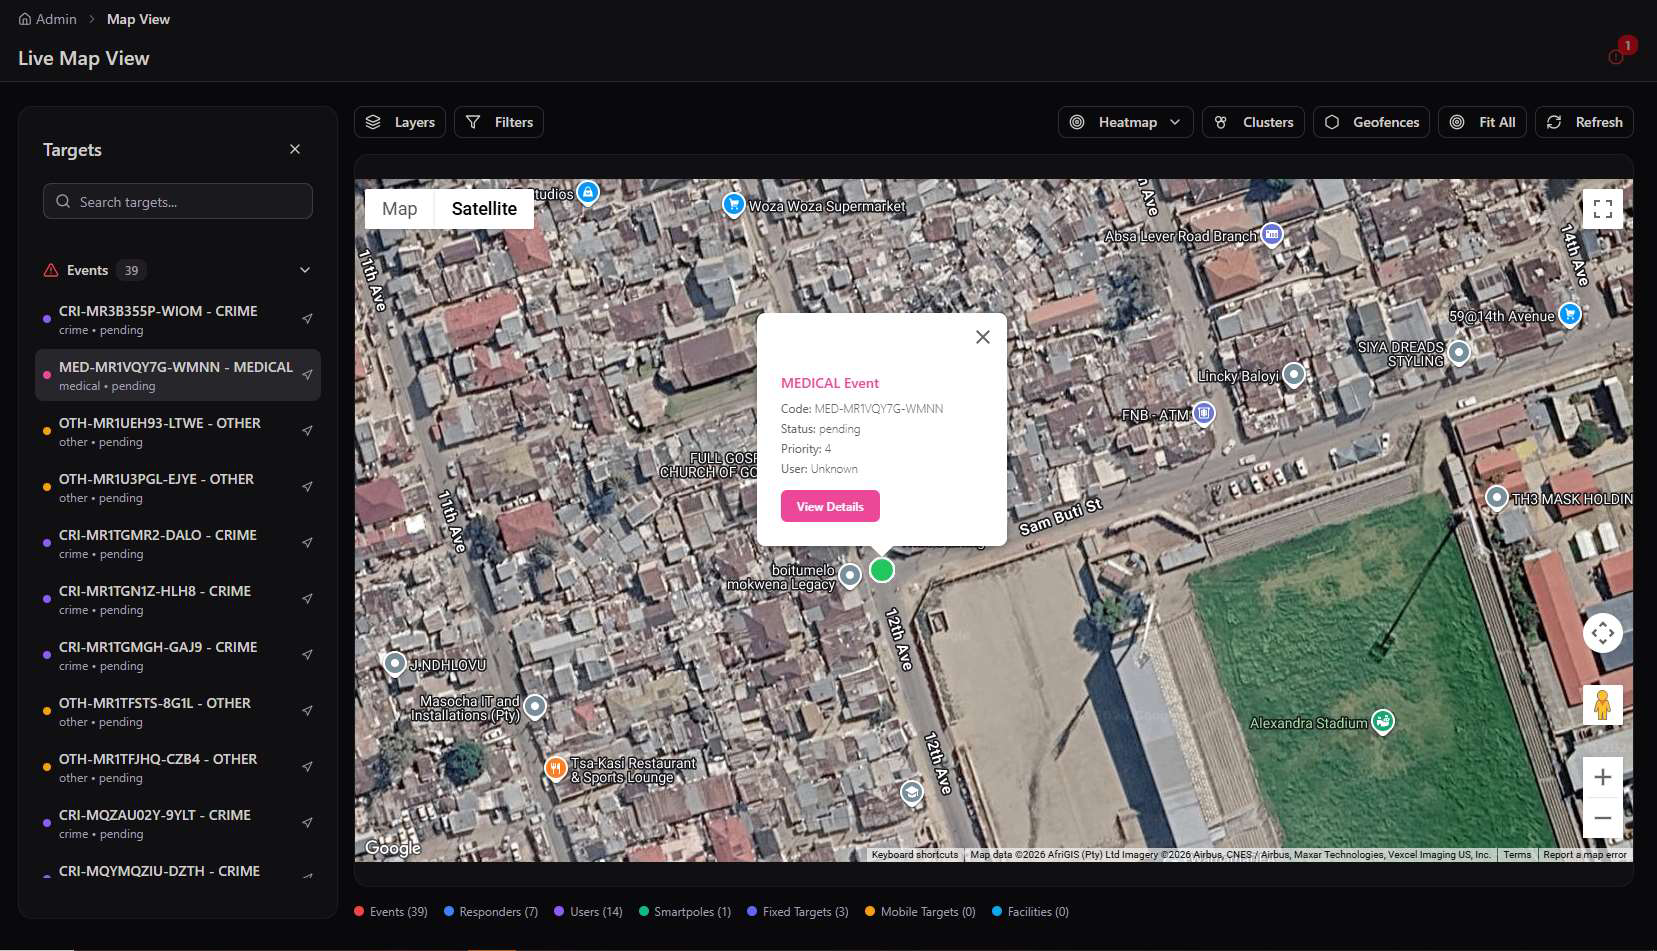
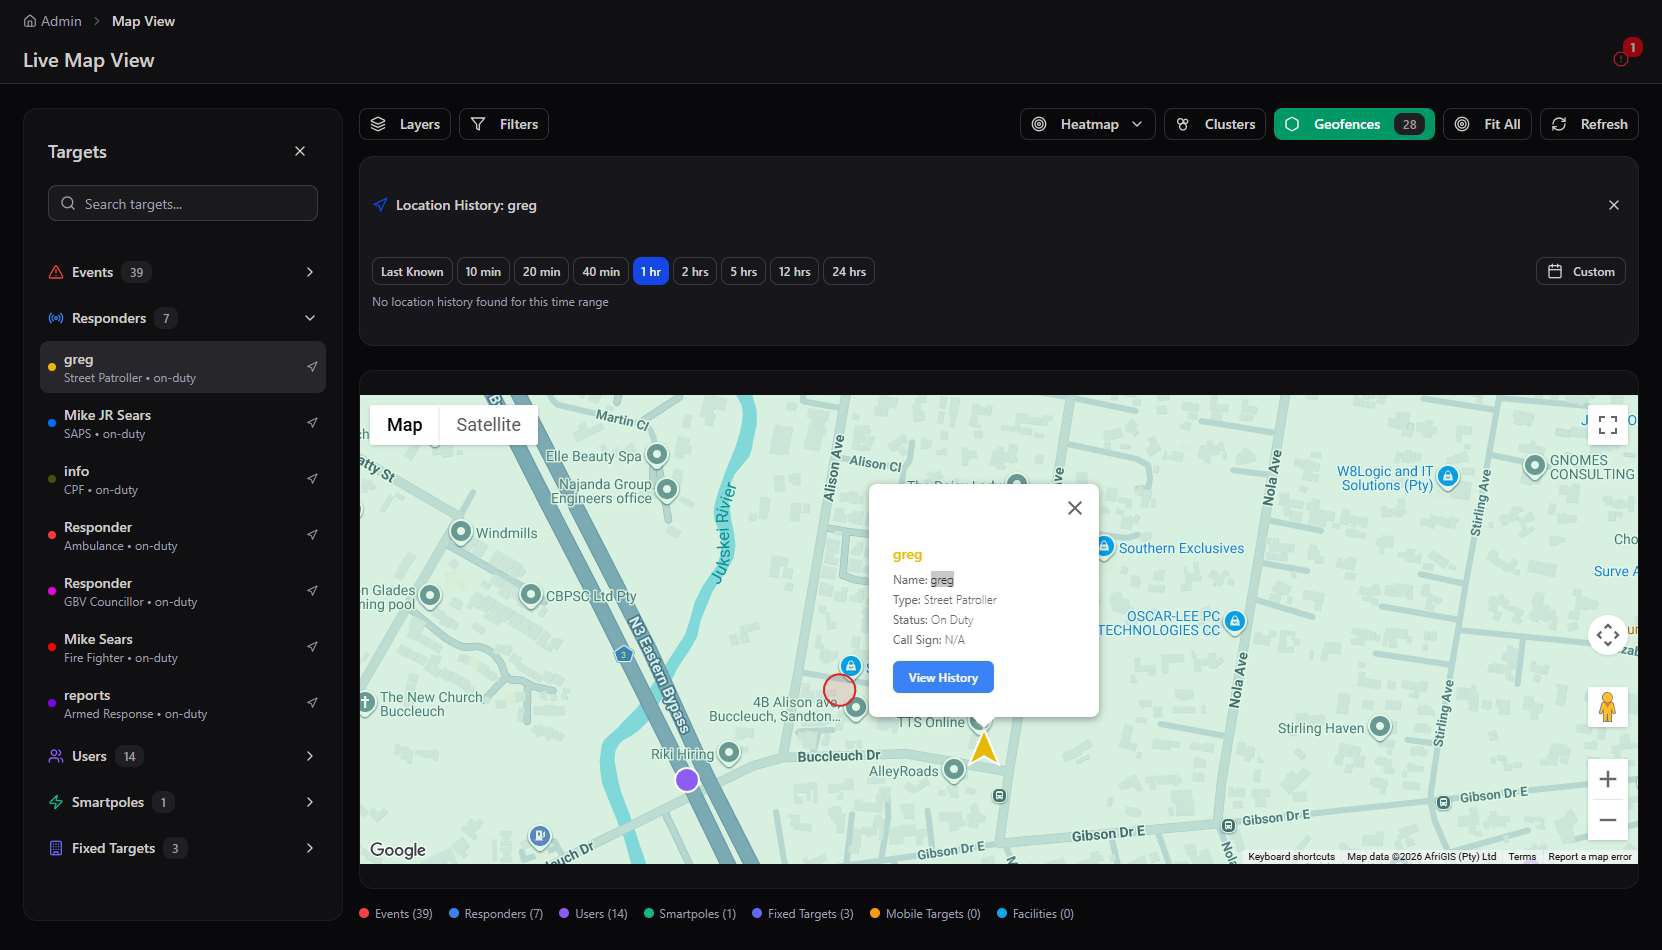
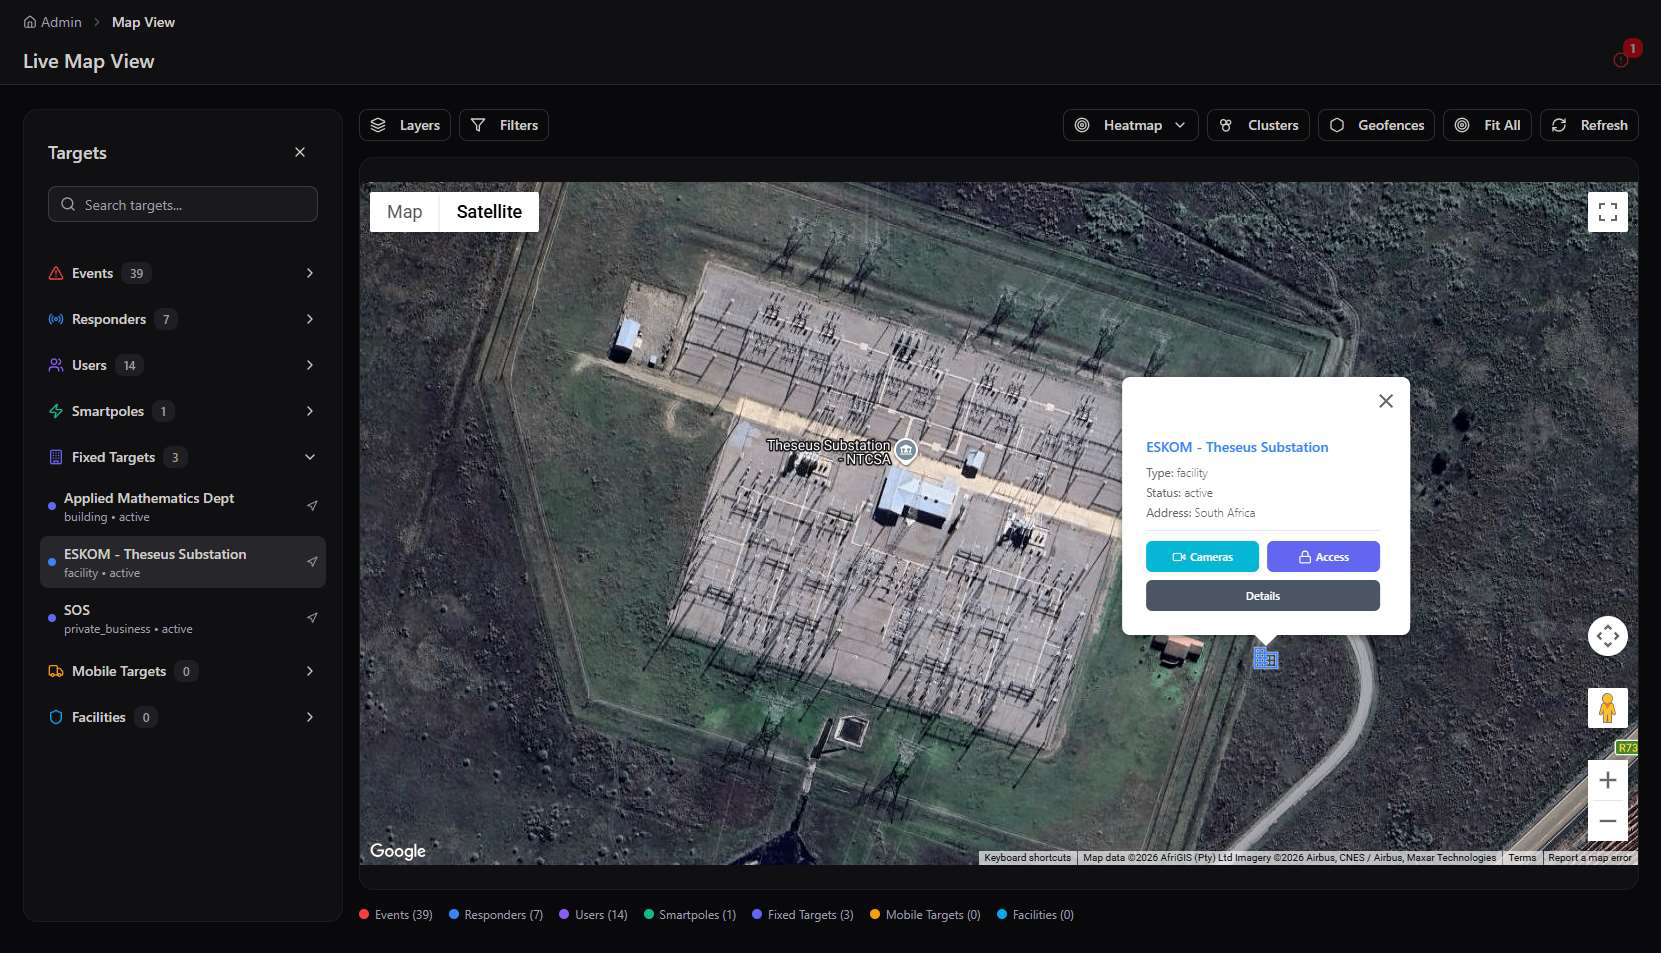
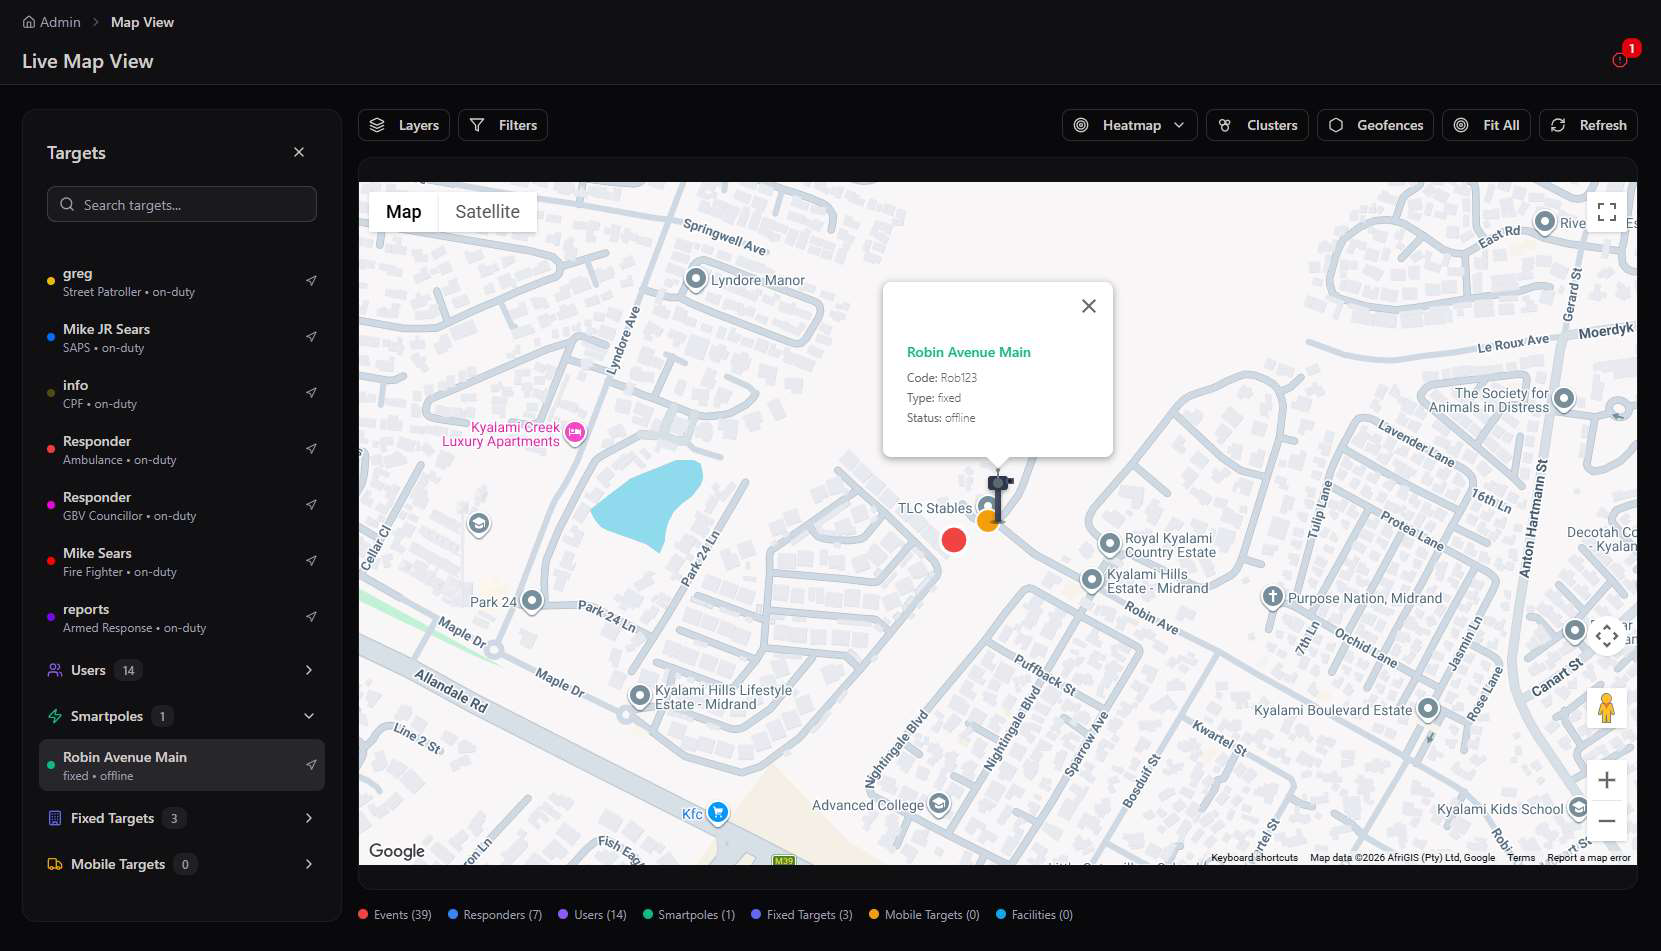
The Targets panel on the left lists every category live on the map — Events, Responders, Users, Smartpoles, Fixed Targets, Mobile Targets, and Facilities — each expandable to its individual entries. Clicking any pin or list entry opens a detail card tailored to that target type.
| Layer | Marker | What the card shows |
|---|---|---|
| Events | Red | Type, code, status, priority, View Details |
| Responders | Blue | Name, type, duty status, call sign, View History |
| Users | Purple | Citizen account markers for reported incidents |
| Smartpoles | Green | Device code, type, online/offline status |
| Fixed Targets | Blue | Facility name, status, address, Cameras/Access/Details |
| Mobile Targets | Orange | Tracked mobile assets (vehicles, patrol units) |
| Facilities | Blue | Police stations, hospitals, clinics, fire stations, metro police |
One click from map to record. Every popup is a jumping-off point, not a dead end — View Details, View History, Cameras, and Access all route straight into the relevant module, so the map stays the fastest way to get to any target's full record.
Live Mission Map
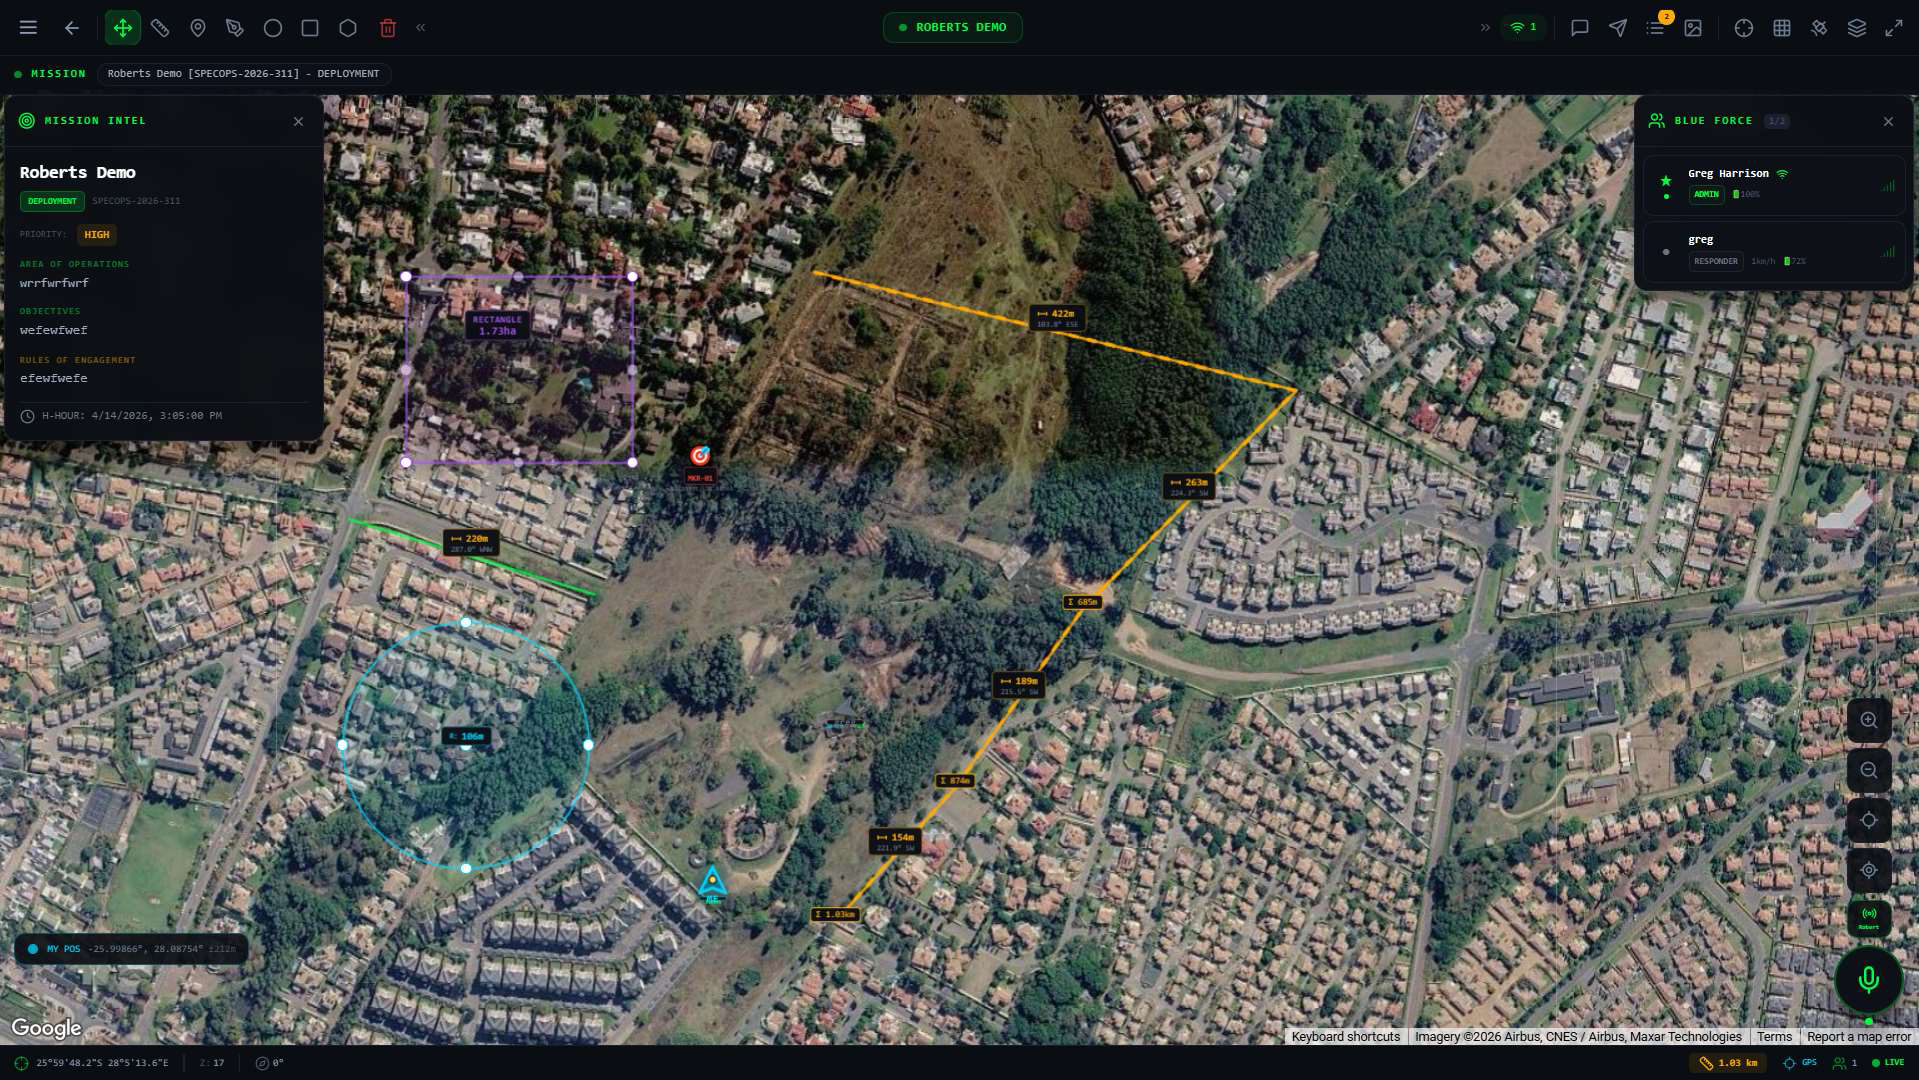
A tactical map built for one deployment at a time — mission intel, Blue Force tracking, and a radial action menu in place of ordinary map controls.
Live Mission Map is the control-room counterpart to the Special Ops flow in the Responder App — the same mission, tracked from the operator's side with a full tactical toolset layered over the map.
Mission Tools
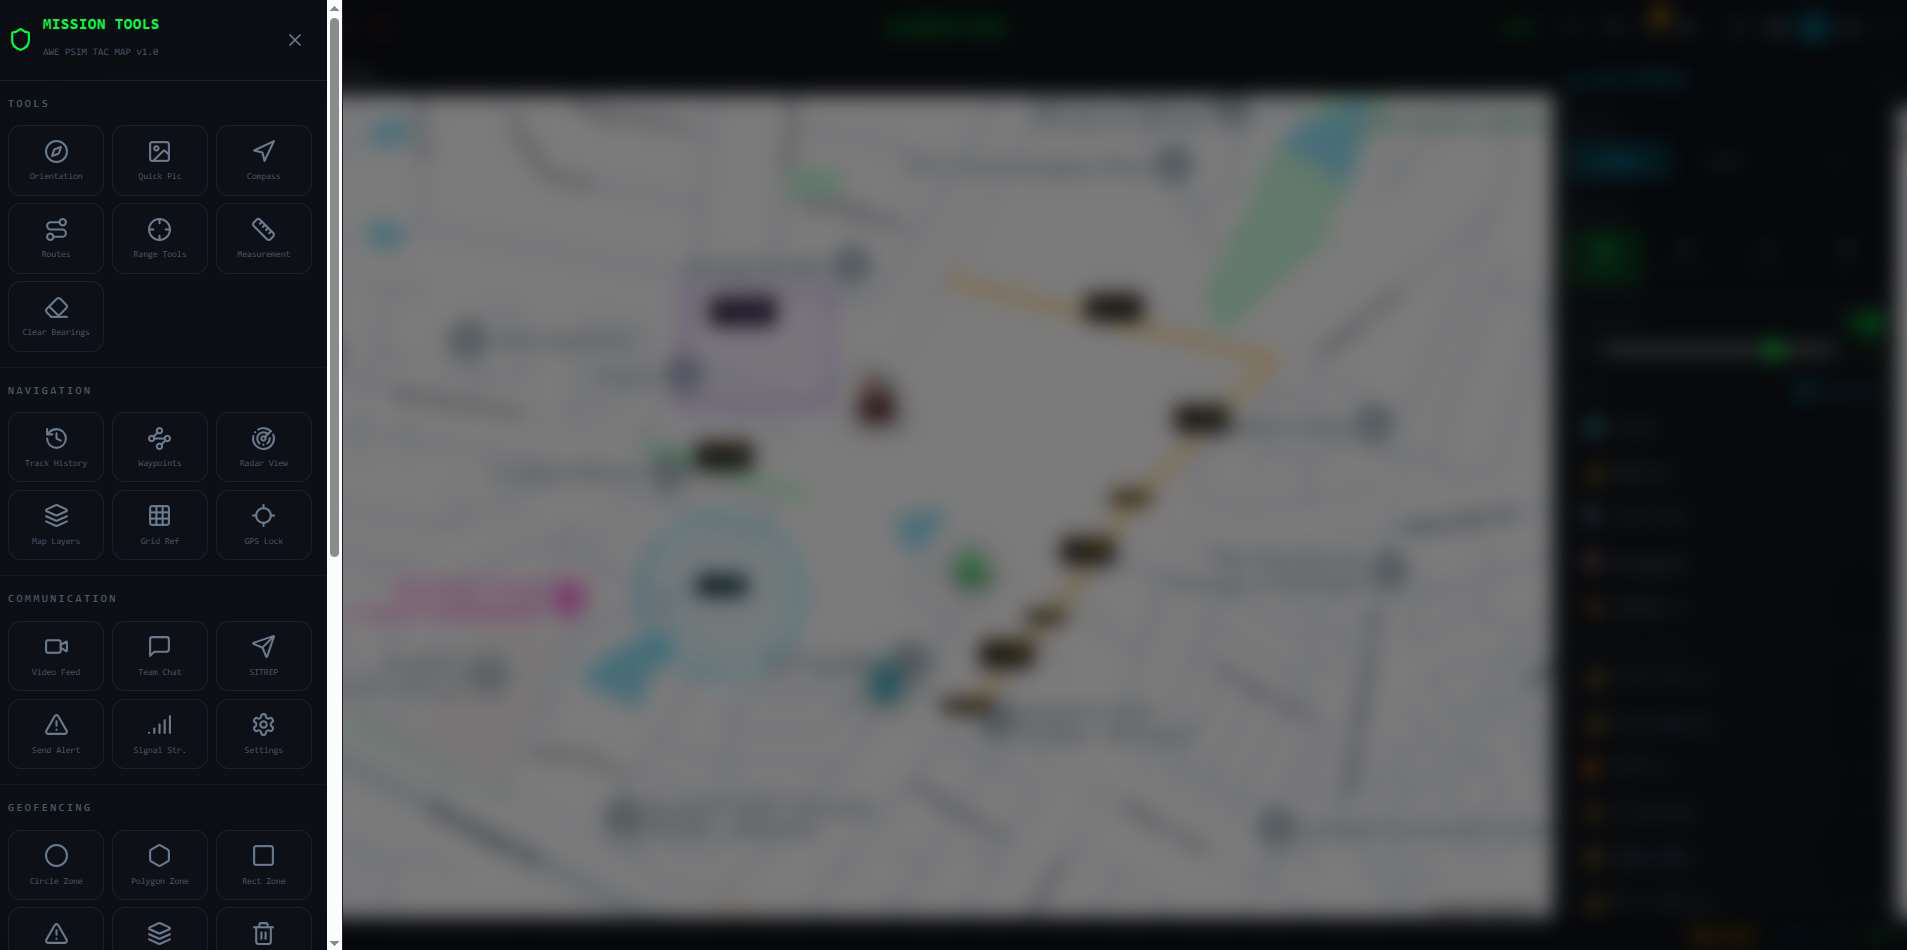
Opening a mission surfaces a dedicated tools panel, grouped by function: measurement and orientation tools, navigation aids, team communication, and geofencing for marking zones directly on the tactical map.
Selecting a mission
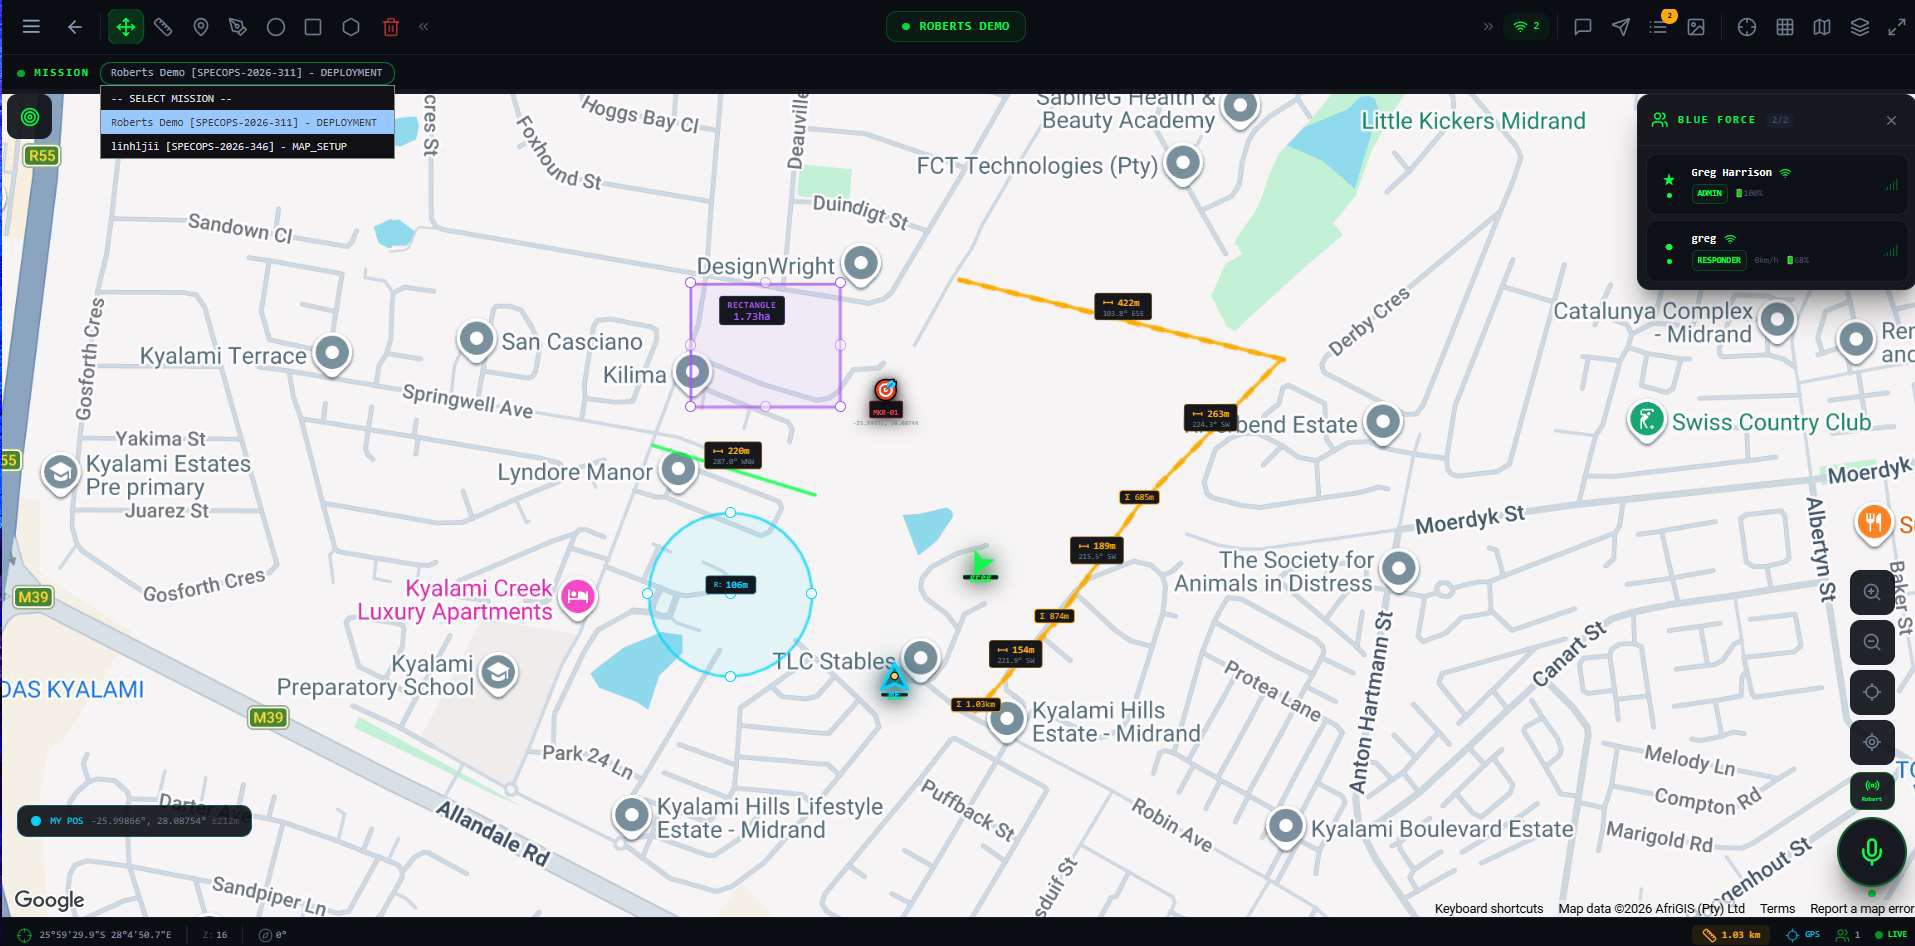
A mission dropdown switches the entire tactical view to a different active deployment, each tagged with its own SPECOPS code and status. Selecting one loads its area of operations, routes, and live Blue Force positions.
The radial tactical menu
Tapping a team member's marker replaces standard map controls with a radial menu of mission actions — messaging, PTT, alerting, and tracking tools arranged one tap from the center.
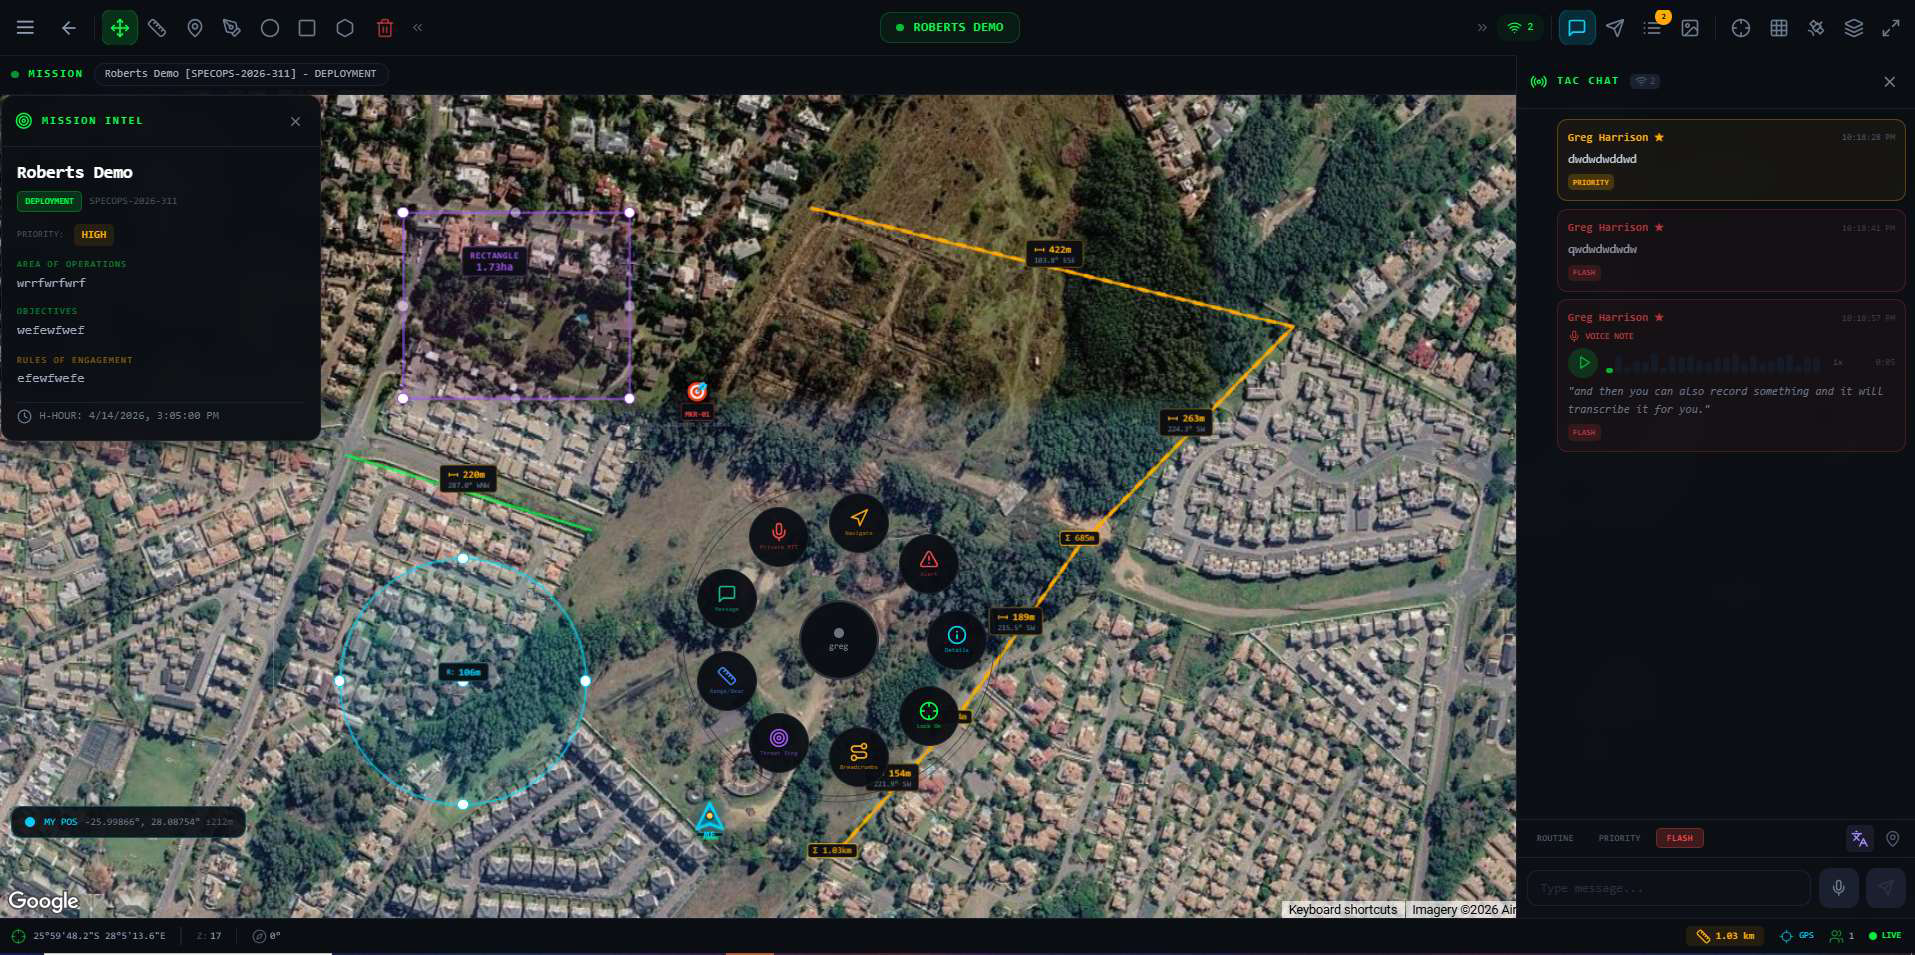
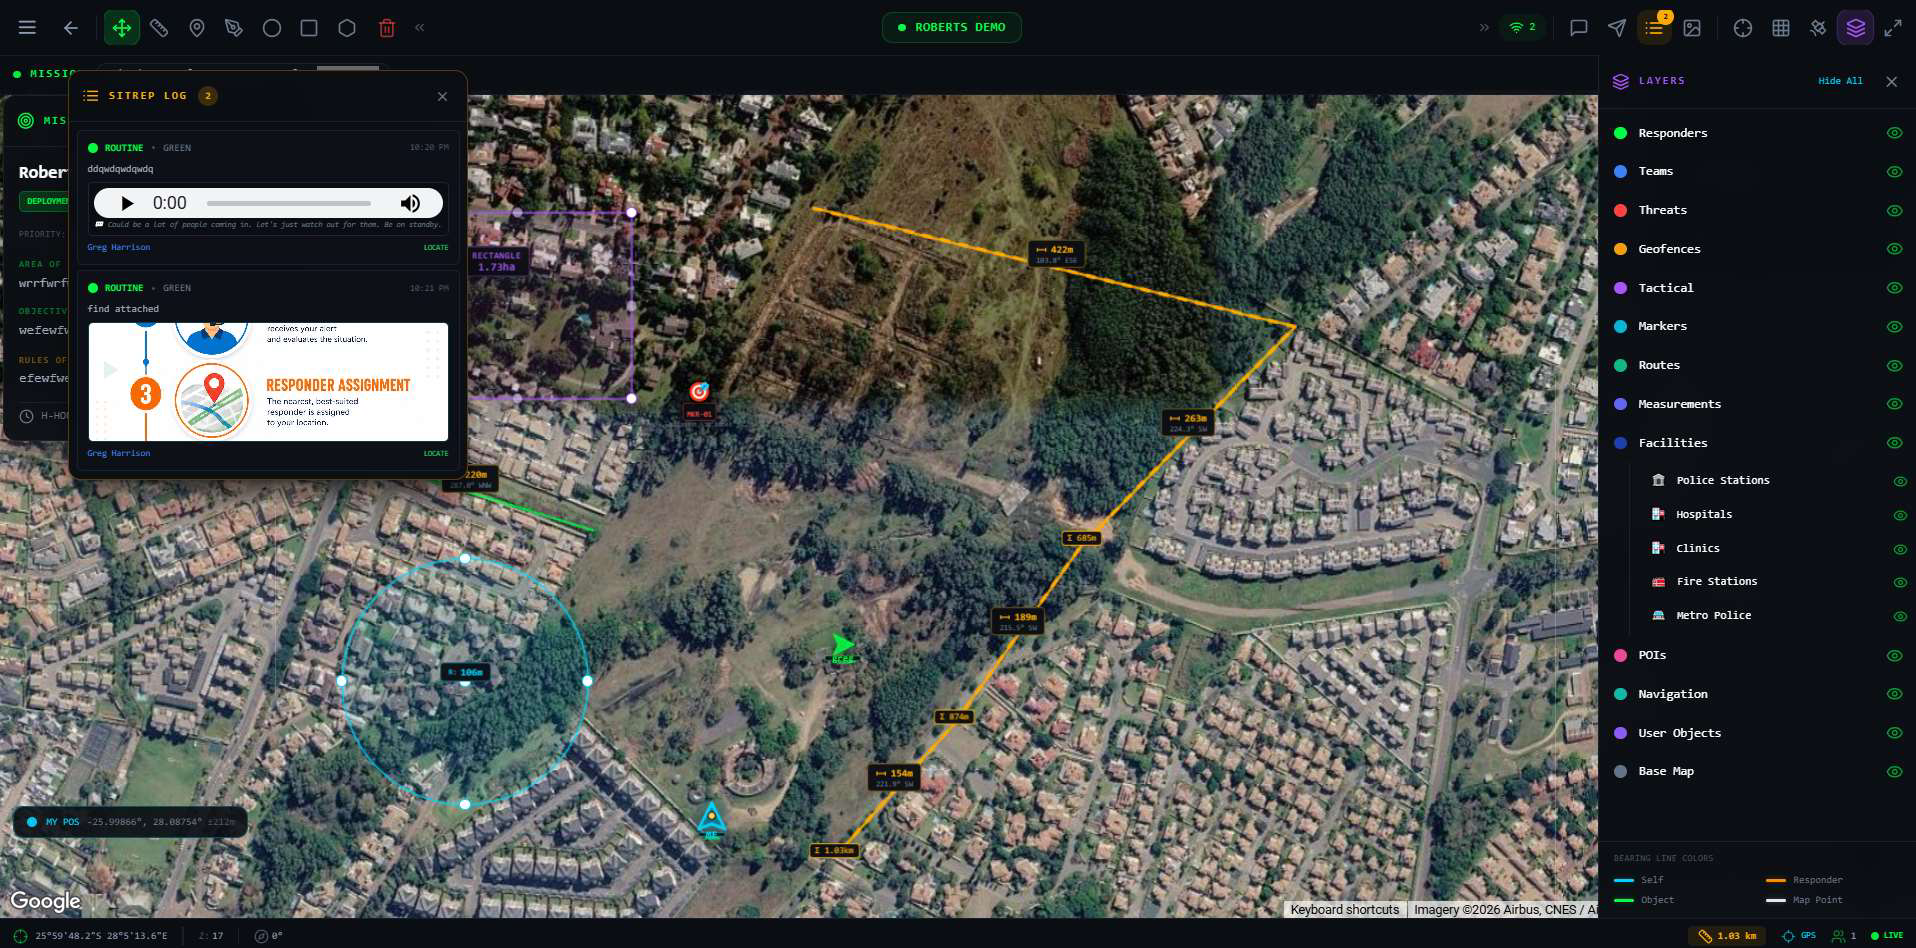
Built for a deployed team, not a solo call. Threat Ring, Breadcrumbs, and Lock On give a commander live tactical awareness of their own team's movement and exposure — tools an everyday single-responder assignment on Map View simply doesn't need.
Map Providers & Settings
The tactical map isn't locked to one provider or one look — switch basemaps, layer types, and lighting presets per mission.
Map Settings controls how the tactical map itself renders — which provider powers it, what kind of imagery it shows, and a set of lighting/detail presets suited to different operating conditions.
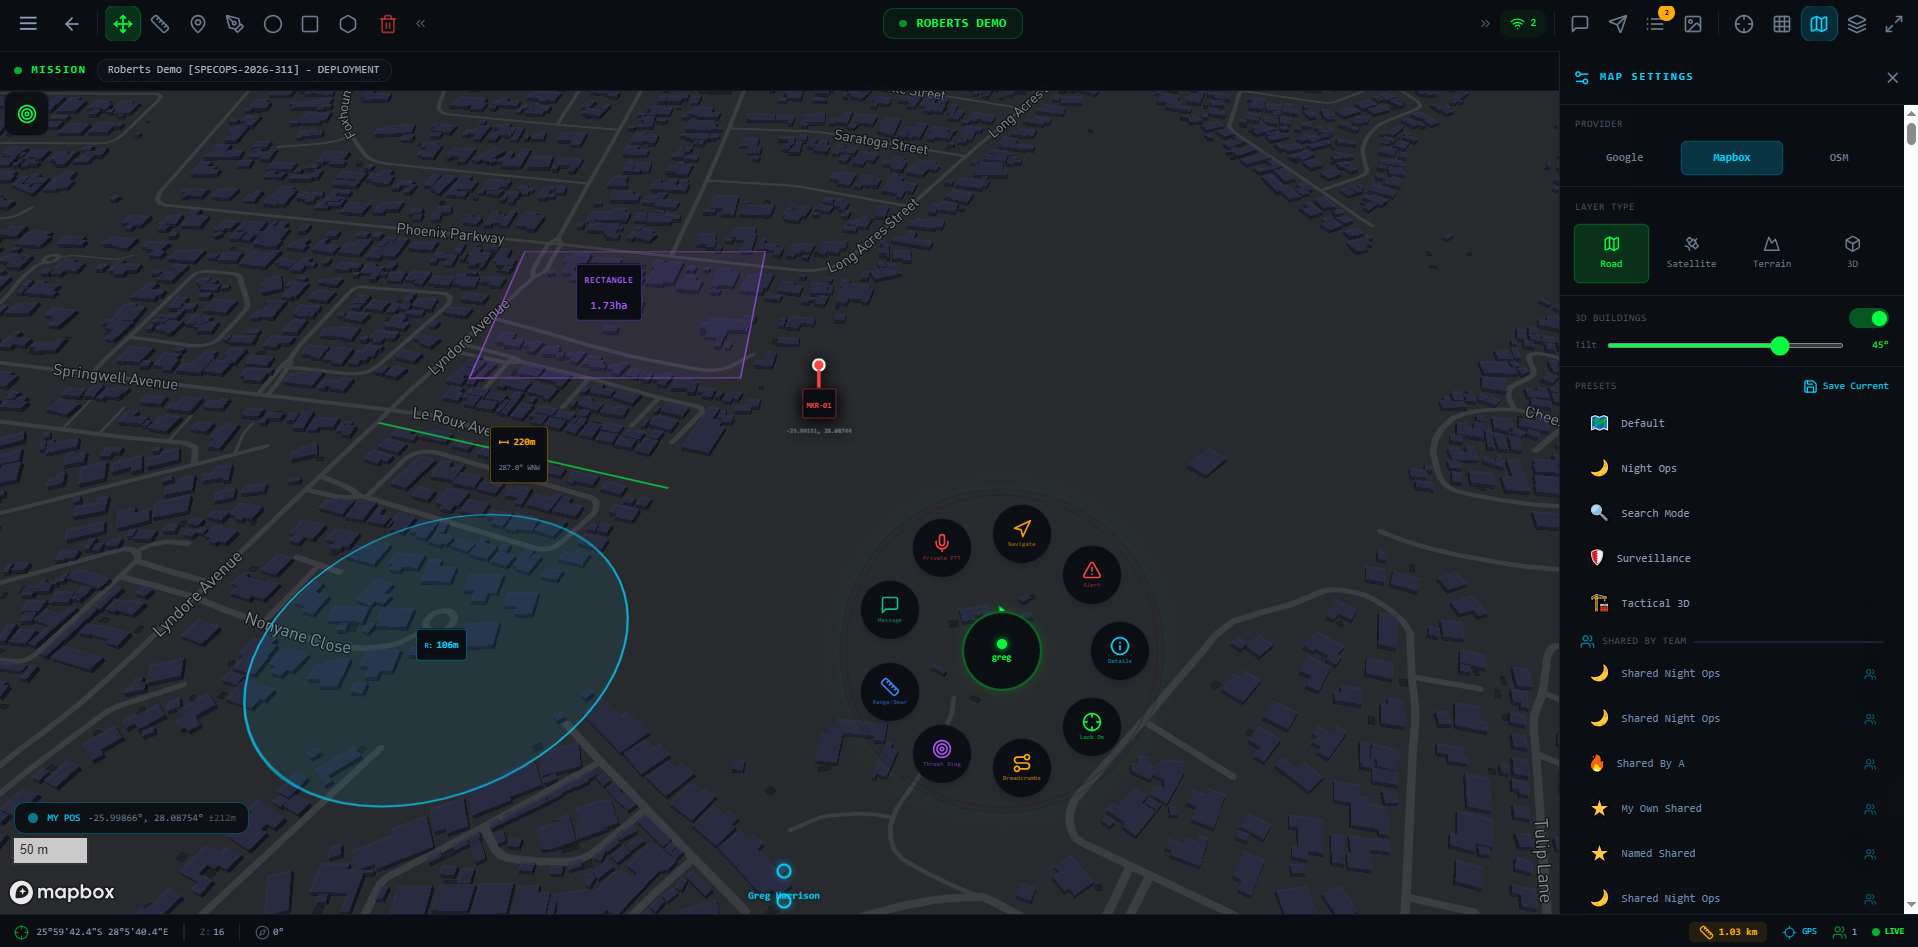
Presets travel with the team. Once a commander saves a configuration, it can be shared to the whole team — so everyone deployed on a mission sees the map the same way, without each person reconfiguring providers and layers individually.
Map View and Live Mission Map, together
Map View keeps the control room oriented on everything happening across the coverage area; Live Mission Map gives a single deployment the tactical depth it needs once it's underway. See the Responder App Guide's Special Ops section for how this same mission looks from the field, and Responder Management for how team assignments are configured.