Panic button
to boots on scene.
One connected flow.
This guide follows a single emergency report end-to-end across all three apps in the AWE Initiative ecosystem — the Citizen app that raises it, the Operator console that dispatches it, and the Responder app that closes it.
The reporting journey
One SOS press sets off a coordinated relay between three apps and three people — and every handoff between them is logged.
The Event Processing module (covered in its own admin guide) is where an operator manages the queue this journey feeds into. This guide walks the same journey from the other side — what the citizen sees when they press SOS, what the operator does with it, and what the responder sees on the ground.
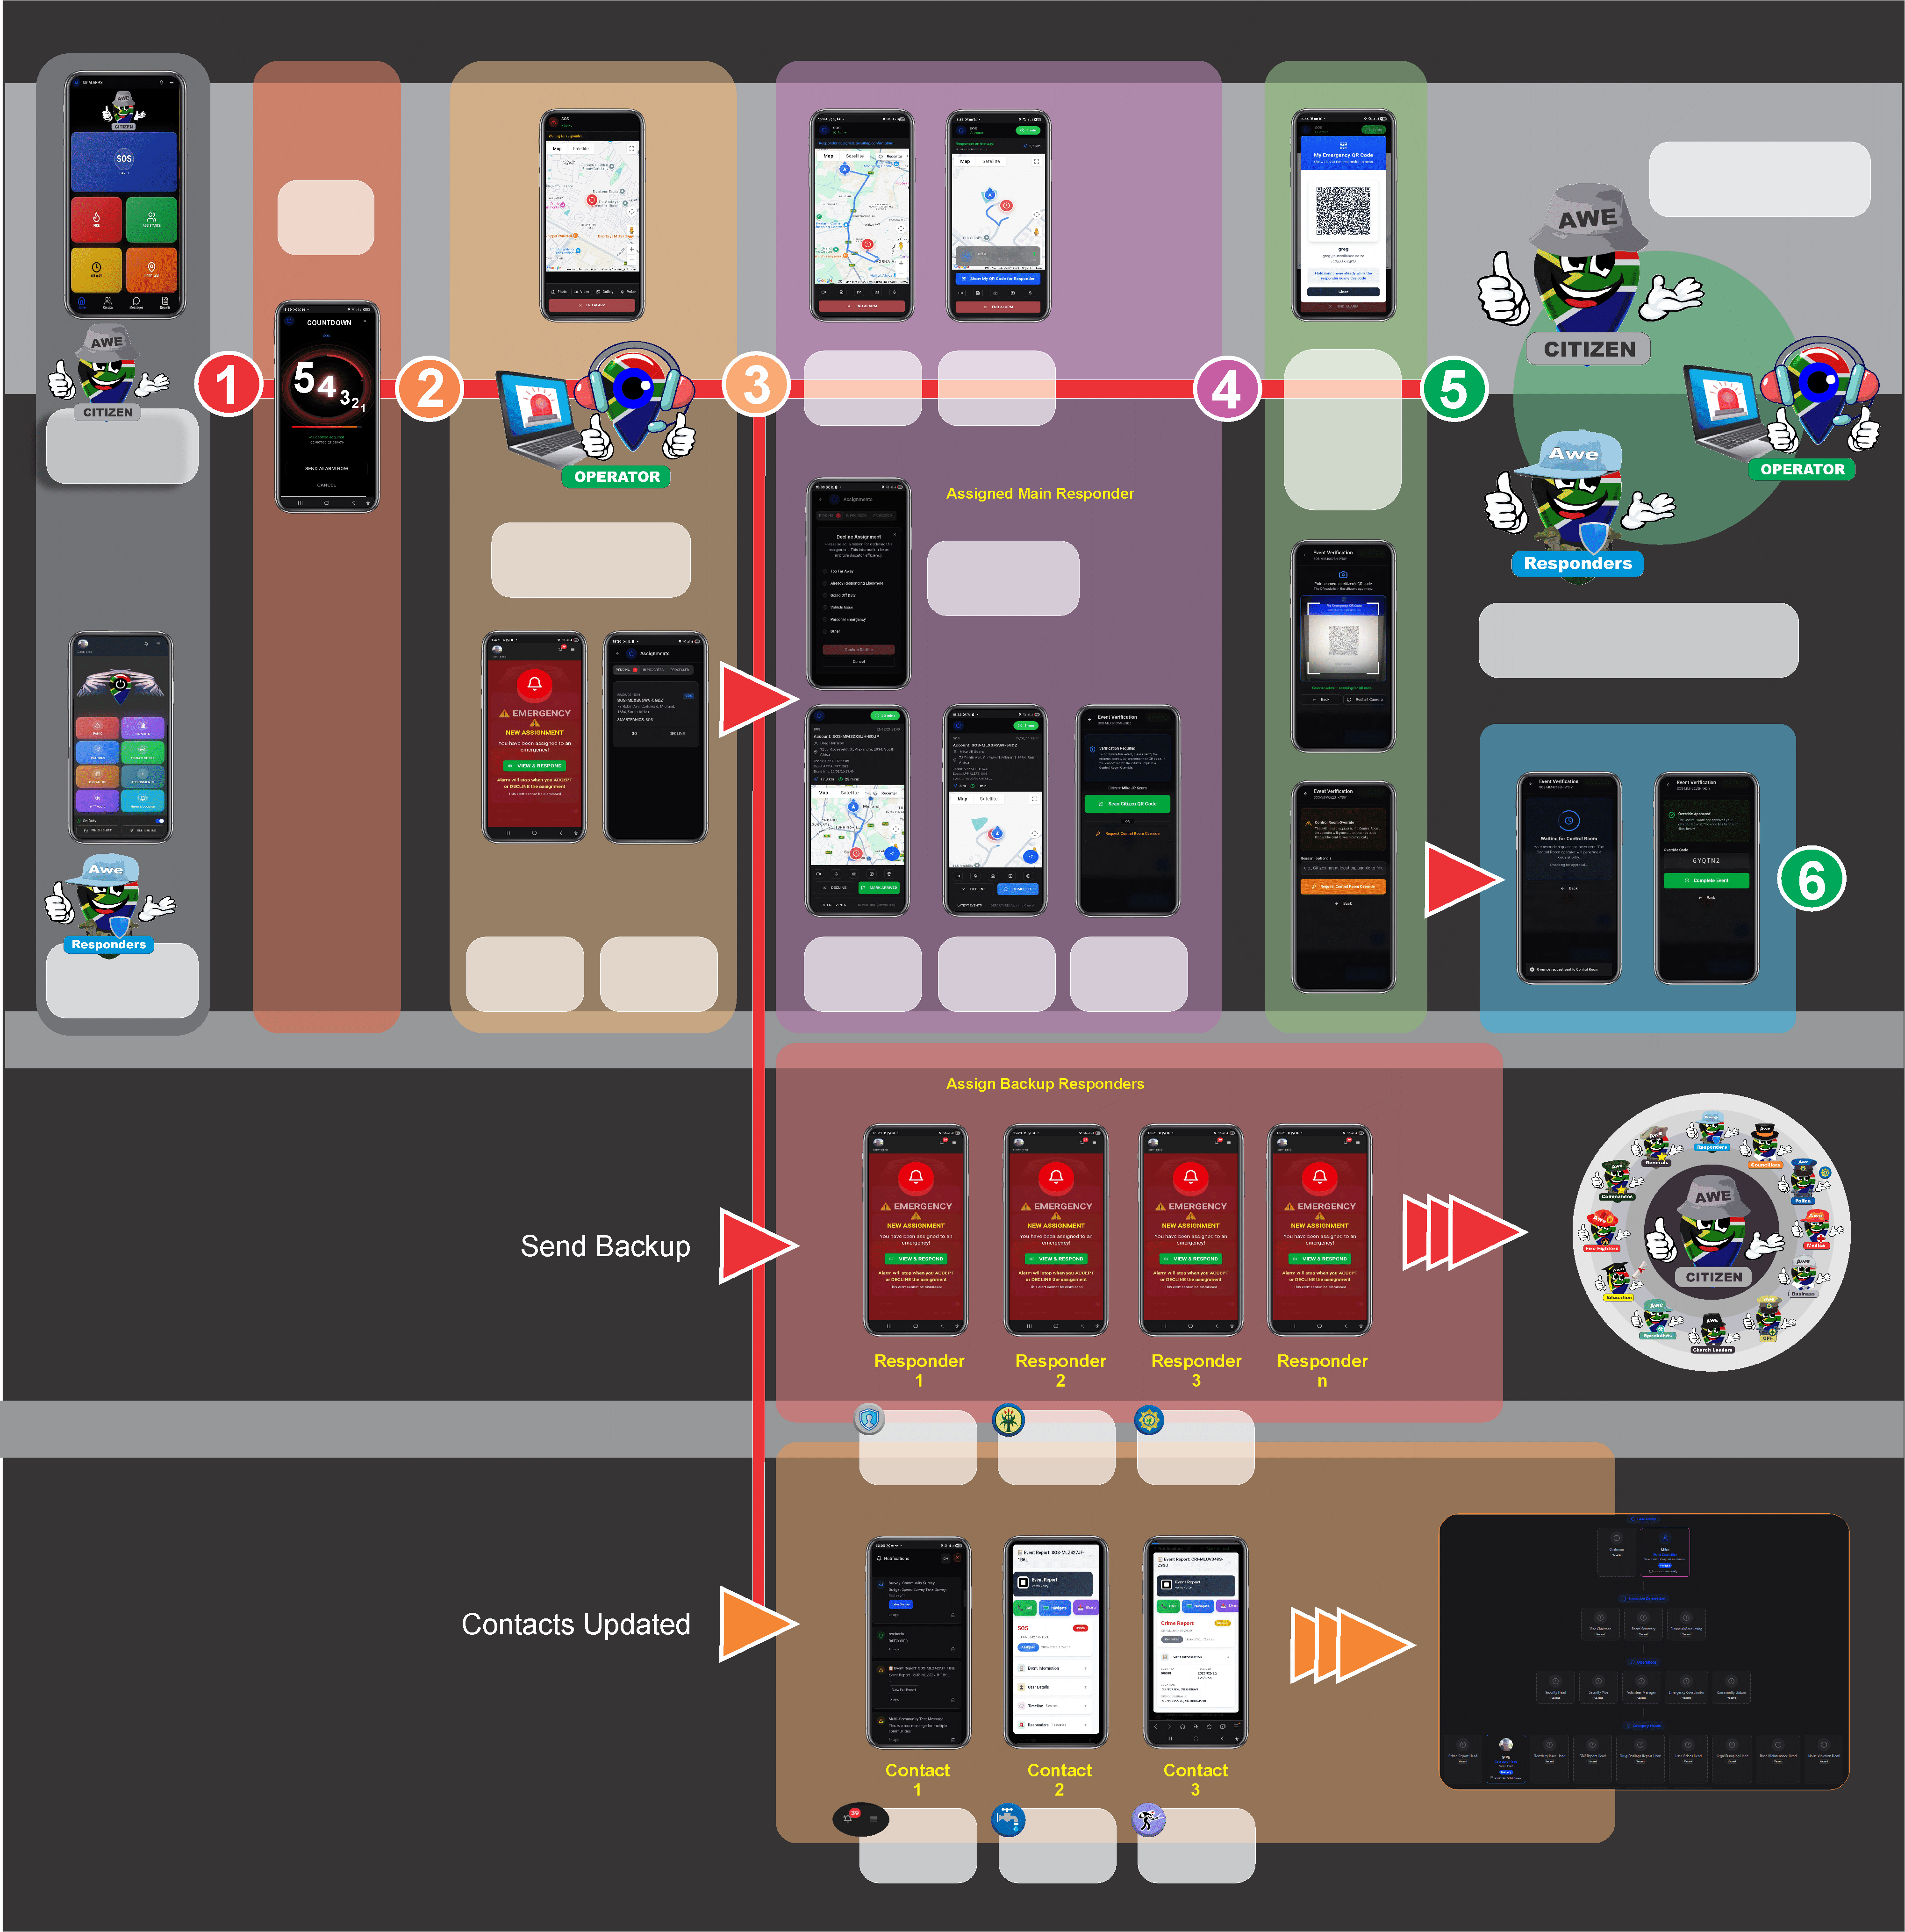
SOS pressed
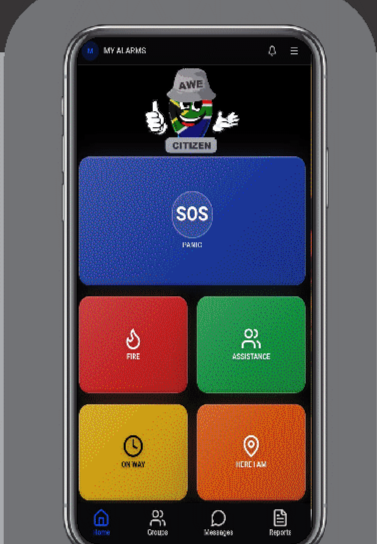
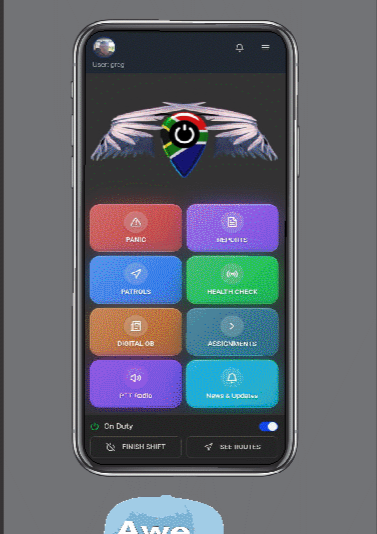
The citizen presses SOS on their home screen, alongside quick-access tiles for Medical, Security, Report, and Location sharing.
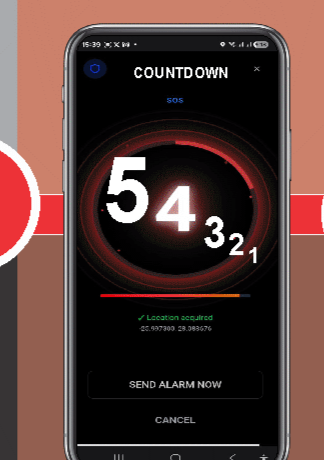
Countdown & cancel window
A short countdown gives the citizen a chance to cancel an accidental press before the alarm actually fires to the control room.
Alarm received & assigned
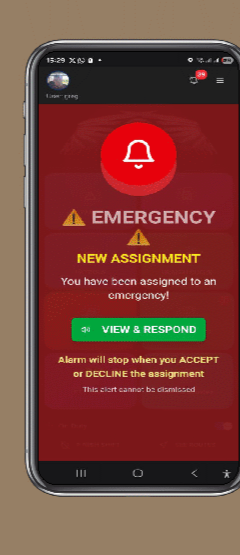
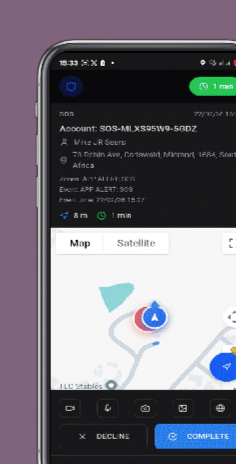
The alarm lands in the Operator console and is dispatched — the map plots the citizen's position and a responder is assigned. The Responder app receives the assignment as a full-screen emergency alert.
Accepted, routed, en route
The responder accepts, gets a turn-by-turn route to the citizen's location, and can decline or request backup at any point along the way.
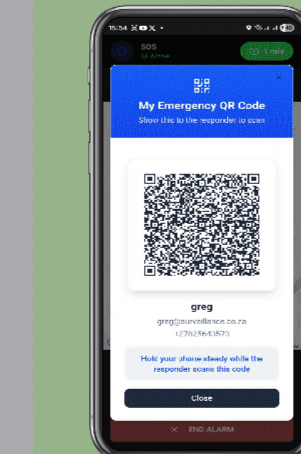
QR verification on arrival
The citizen displays a personal Emergency QR code; the responder scans it on arrival to confirm they've reached the right person, not just the right pin on a map.
Control room approval & close
The scan is submitted for control room approval; once approved, the responder completes the event and it moves to resolution and reporting.
Why the QR step exists. A GPS pin can be off by meters, especially indoors or in dense communities. A face-to-face QR scan is the one point in the entire workflow that confirms — not estimates — that the right responder found the right person.
Raising the alarm
A single SOS press, a brief cancel window, and a personal QR code — the citizen's entire role in the workflow.
The Citizen app is deliberately minimal at the moment that matters most: one large SOS button, a short countdown to cancel a mistake, and a QR code that later proves identity to whoever shows up.
Home screen & quick actions
Alongside the primary SOS button, the home screen surfaces Fire, Assistance, On Way, and Here I Am tiles — so lower-urgency needs don't have to be routed through the same channel as a life-threatening emergency.
Tracking the response
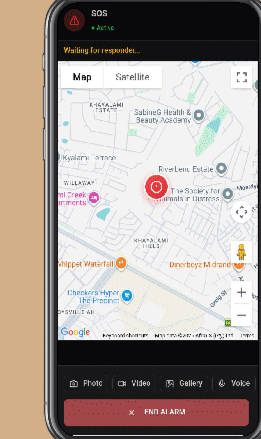
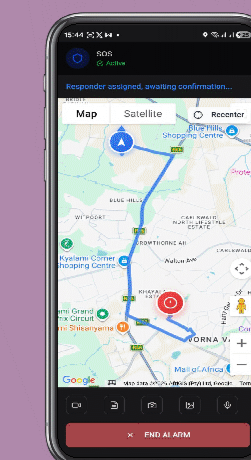
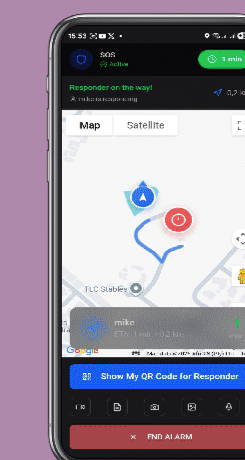
Once the alarm is sent, the citizen's own screen switches to a live map — "Waiting for responder," then updated with the responder's live position and ETA once one is assigned and en route.
Cancel first, escalate second. The countdown exists because false alarms are common and costly — every second an operator spends triaging a mis-press is a second not spent on a real one. Cancelling during the countdown means the event never even reaches the Operator console.
Receiving & dispatching
The alarm becomes a live event on the map, and the nearest capable responder gets the assignment.
This is the same Operator console detailed fully in the Event Processing Admin Guide — the Event Queue receives the alarm, and the operator uses the Event Details view to plot the citizen's location, pull up nearby facilities and responders, and dispatch.
From alarm to assignment
- The alarm appears in the live queue with the citizen's location already plotted on the map.
- The operator reviews nearby responders and facilities, then assigns the event to the best-positioned responder.
- The Responder app receives the assignment instantly as a full-screen alert, with an audible alarm that continues until accepted or declined.
One console, every channel. This SOS is one of seven intake channels the Operator console handles — the same triage, dispatch, and resolution tools apply whether the event came from a citizen's panic button, a CCTV trigger, or a WhatsApp report. See the Event Processing guide for the full multi-channel intake picture.
Staying in the loop after dispatch
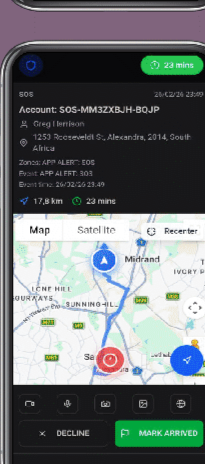
Dispatch isn't a handoff into a black box — the operator's Event Details view keeps tracking the assigned responder's route and ETA, and remains the point of control if backup needs to be sent or the assignment needs to change.
Accepting & responding
From a full-screen alert to a turn-by-turn route — the responder's view of the same event.
The moment an operator dispatches an event, the assigned responder's phone interrupts with a full-screen New Assignment alert. From there, the Responder app carries them through acceptance, navigation, and arrival.
New Assignment alert
A red, full-screen emergency alert with an alarm sound that continues until the responder taps Accept or Decline — designed to be impossible to miss, even in a pocket.
Assignments list & details
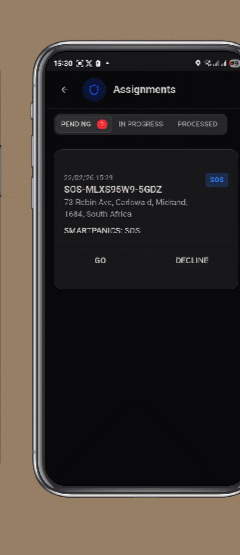
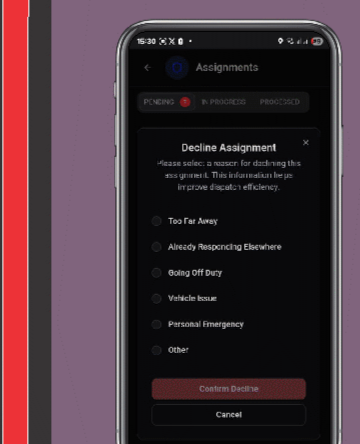
Accepted assignments move to the responder's Assignments list, showing task details, incident type, and any decline-with-reason options if the responder genuinely can't respond.
Live map & routing
Once en route, the app switches to a satellite/map view with a routed path from the responder's current position to the citizen's location.
Request backup, anytime
If the situation looks bigger than one responder can handle, backup can be requested directly from the assignment screen — see Backup & Contacts below for what that triggers.
Confirming arrival, closing the loop
A QR scan proves the responder found the right person; control room approval proves the event is genuinely resolved.
Arrival isn't the end of the workflow — it's the point where the platform switches from tracking location to confirming identity, and finally routes back through the operator for sign-off.
Scan to verify
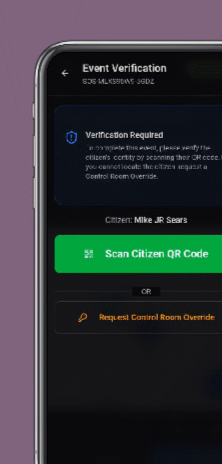
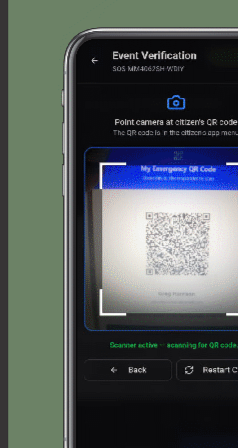
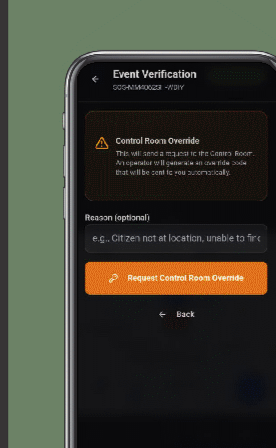
On arrival, the responder opens Event Verification and scans the citizen's personal QR code with the in-app camera. This closes the gap between "the responder is near the pin" and "the responder is with the citizen."
Waiting for control room
Once scanned (or an override is requested), the verification is submitted and the responder's screen shows Waiting for Control Room — the operator reviews and approves the request, generating an override code, before the responder can mark the event complete.
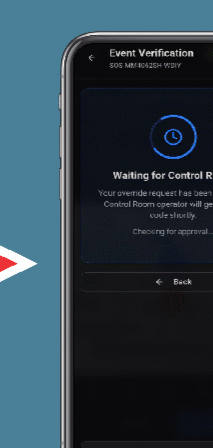
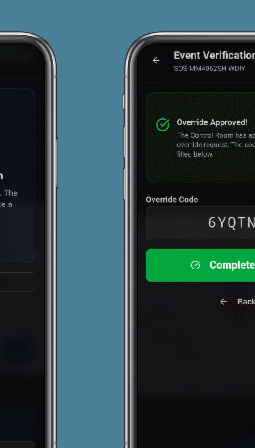
A deliberate human checkpoint. Verification doesn't auto-close on scan alone — it routes back through the operator so a second, accountable set of eyes confirms the event before it's marked resolved. This mirrors the Resolution & Reporting stage of the Event Processing module, where every closed event needs a recorded reason.
Complete the event
With control room approval in hand, the responder marks the event Complete. From here it flows into the same resolution and reporting pipeline documented in the Event Processing Admin Guide — reason recorded, timeline closed, available for later review.
When one responder isn't enough
Escalating to multiple responders, and keeping the wider community and its named contacts in the loop.
Not every event resolves with a single responder. The workflow includes two escalation paths that run in parallel to the main SOS relay — sending backup, and notifying contacts.
Sending backup
A backup request fans out the same full-screen New Assignment alert to every available responder simultaneously — Responder 1, 2, 3, and so on — rather than waiting on a single reassignment. Each can independently accept or decline, so the first available body reaches the scene fastest.
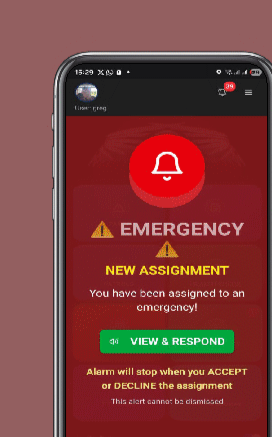
Same alert, wider net. Backup responders see the identical emergency alert screen as the original assignee — accept, decline, view details — so there's no separate interface to learn under pressure.
Contacts updated
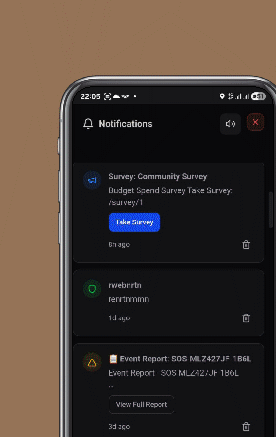
In parallel, event and survey notifications reach the relevant named contacts and community leadership — the same role-based directory documented in the Communications Admin Guide's Contacts module — so the people responsible for a category of report, or a ward's leadership structure, aren't left finding out secondhand.
One workflow, three apps, every role covered
From a citizen's single SOS press to a responder's completed event, this journey touches every app in the AWE Initiative ecosystem. For the deeper detail behind each stage, see the Event Processing, Responder Management, and Communications Admin Guides.